
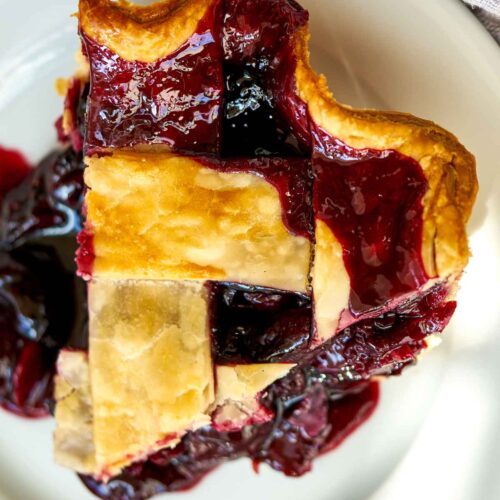
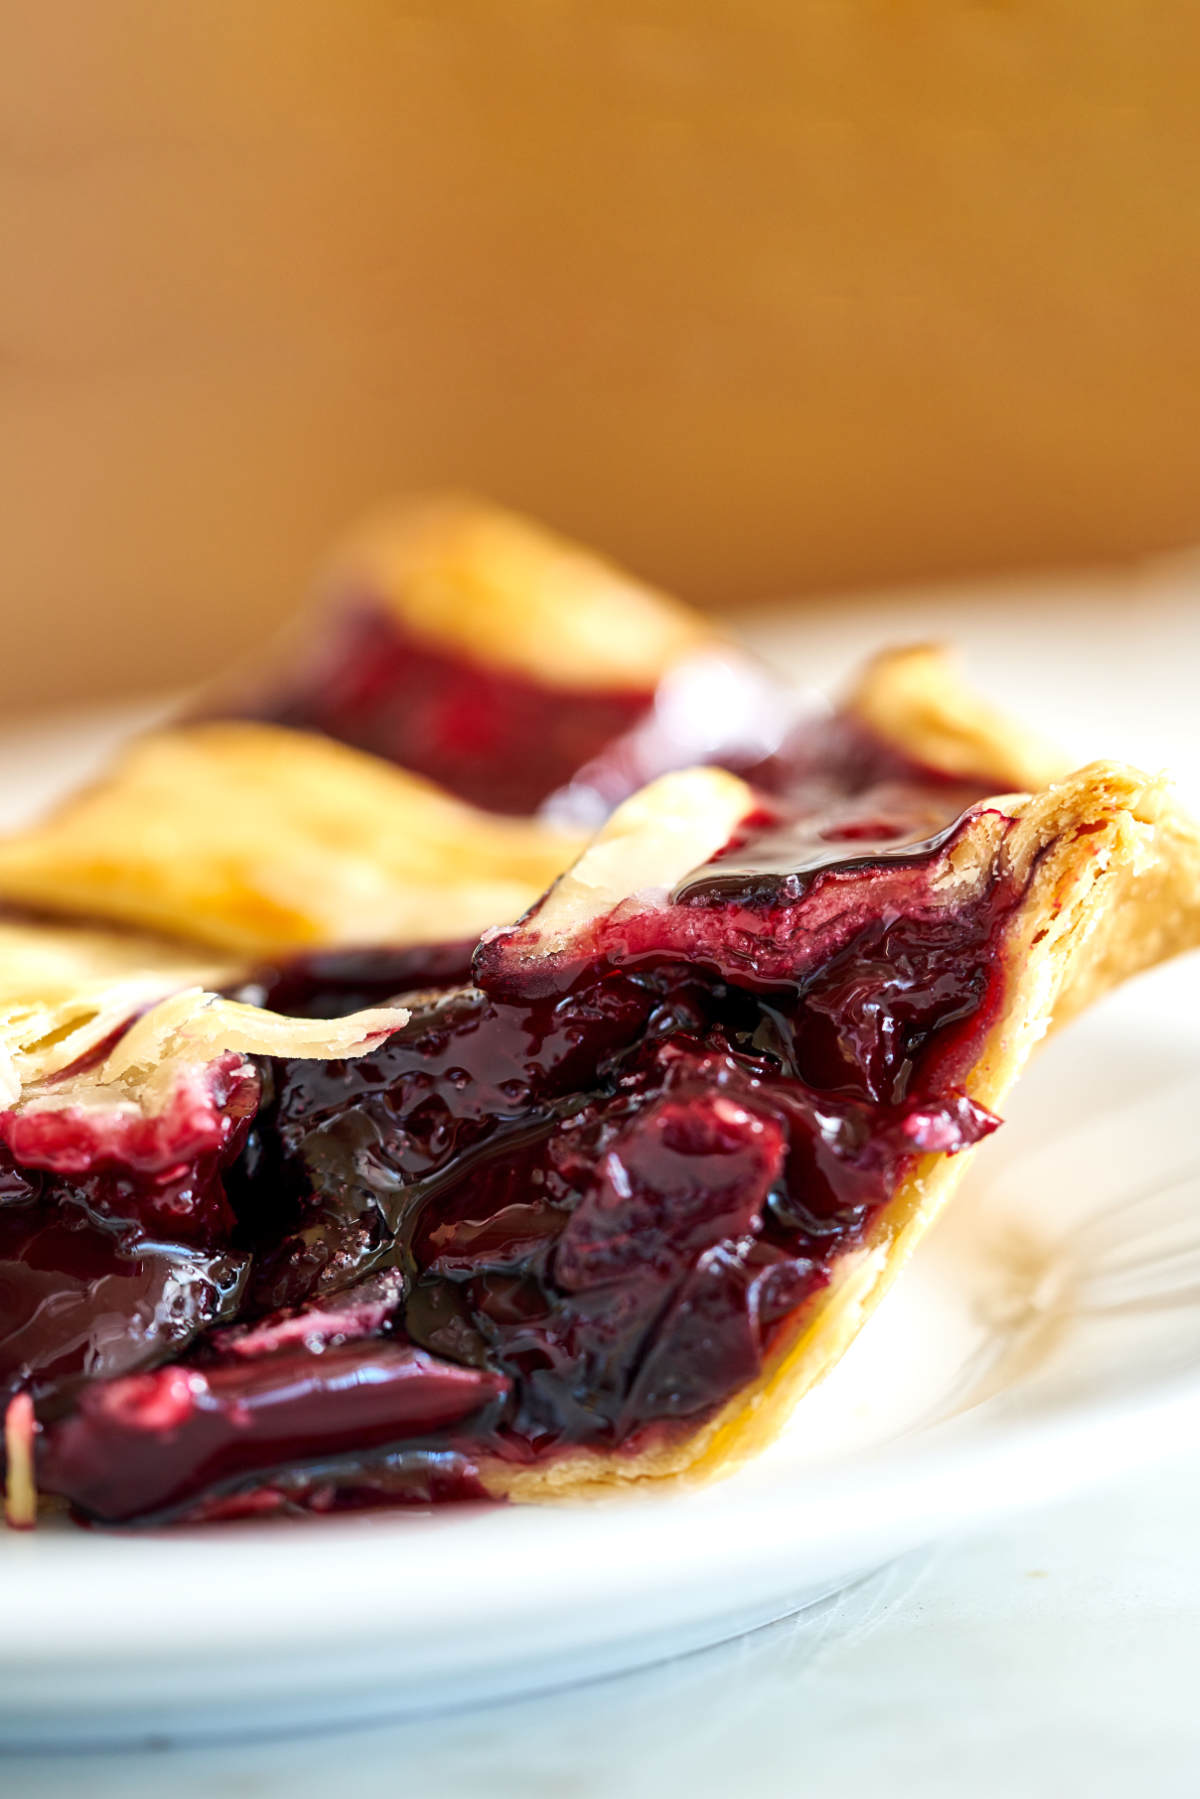
This cherry pie filling yields the PERFECT sweet cherry pie every time. This pie has a homemade cherry pie filling that you will fall in love with, and I fully support taking the shortcut of buying ready-made pie crust to make things easier. Plus, I’m sharing how to make this pie delicious with fresh or frozen cherries!
Why You Should Make This Recipe
This pie is delicious with fresh or frozen cherries, whichever you prefer or have ready to use. They have exactly the same texture after baking given the slight changes detailed below.
The filling is thickened with arrowroot powder so you don’t get a runny filling. You can also use cornstarch as a substitute.
You can use store-bought pie crust OR your favorite homemade or family recipe to accompany this perfect filling. We blind-bake the crust for a perfectly crisp bottom.
This recipe is a great way to take advantage of seasonal produce. You can even see if there are any pick-your-own cherry farms near you to add to the fun. If you’re looking for a fall-season pie, try this homemade pumpkin pie or these mini pumpkin hand pies.
Ingredient Notes & Substitutions
Cherries – I use fresh bing cherries or sour cherries for this recipe. You can use frozen cherries of any variety, too. If you are using sour cherries, the filling won’t come out as sweet, so you will need to supplement with 2 tablespoons of sugar in the recipe.
Pie Crust – My go-to is a bakery-bought frozen pie crust. Make sure to thaw thoroughly before rolling.
Sugar – My preferred sugar is Turbinado sugar. You can use any granulated sugar in this recipe, too.
Arrowroot powder – This is the thickening agent. Cornstarch is a suitable replacement in a 1:1 ratio.
Butter – Make sure to use unsalted butter.
How to make this recipe
We will start by making the filling, then I will show you what to do with your crust. You can use store-bought, bakery-bought, or your favorite pie crust recipe.
Cherry filling
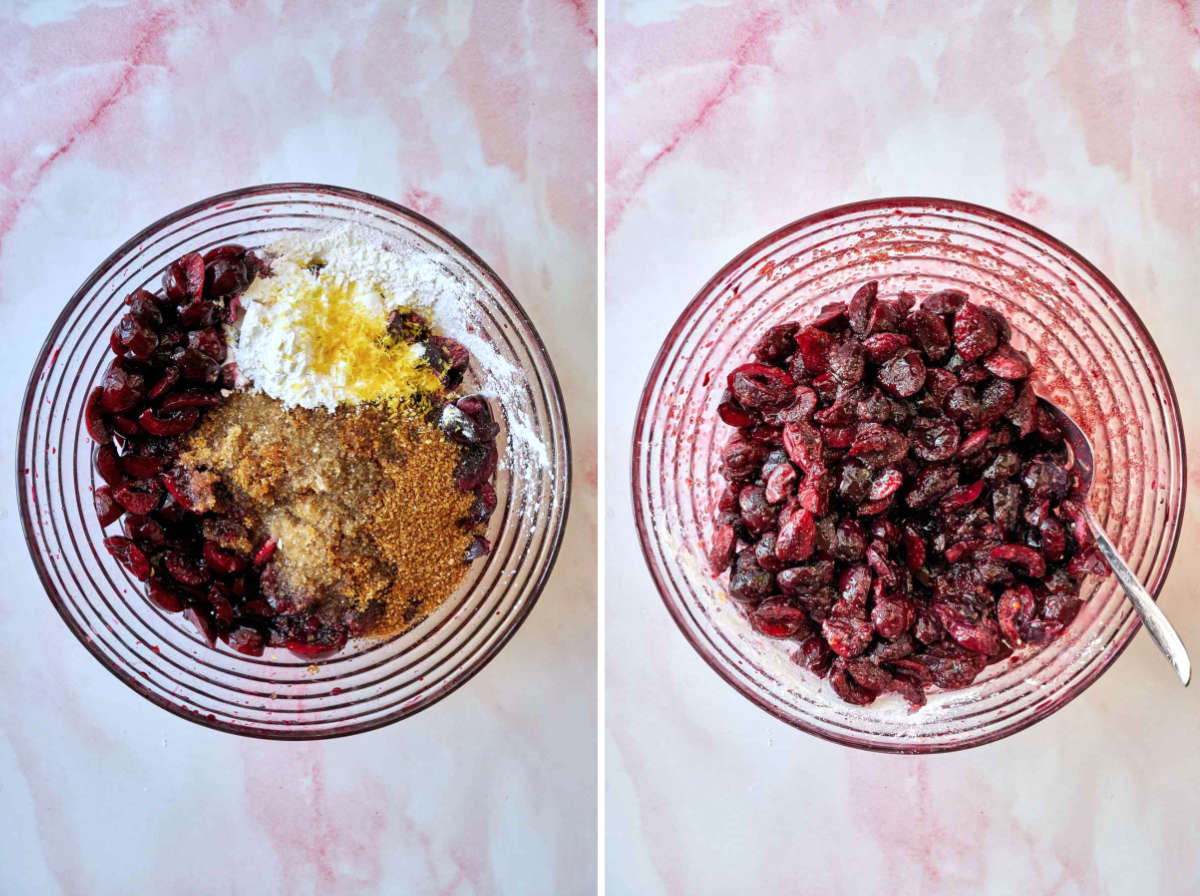
The first thing you need to do is prep your cherries for the pie. Remove the pits and the stems from the cherries before quartering them roughly. You can do this using a disposable straw, but cutting them in half to pit, or using a cherry pitter.
Note: Frozen cherries do require different preparation. Make sure they are completely thawed and drained before using and add an extra two teaspoons of arrowroot powder with the thawed cherries.
In a large bowl, add the quartered cherries, sugar, arrowroot powder, lemon zest, and lemon juice to a large bowl. Mix the ingredients well, and your filling is ready!
Blind bake the bottom crust
Next, make space and roll out your pie crust until it’s about 1/8 of an inch thick. Remember that if you’re using a frozen pie crust, you must allow time for it to defrost and become pliable.
Press the dough into your chosen pie dish and chill in the refrigerator for 30 minutes. Chilling the dough is important as this helps prevent a soggy bottom on your pie.
In the meantime, preheat the oven to 350F.
Blind bake the crust by covering it with parchment paper and weighing it down with dry beans, pie weights, small shapes of dried pasta noodles, or even clean pennies and other change. Bake for 10-12 minutes.
Take it out of the oven and allow it to cool to room temperature. Then, add the cherry filling to the blind-baked crust.
Shop my favorite pie dish here!
The lattice top crust
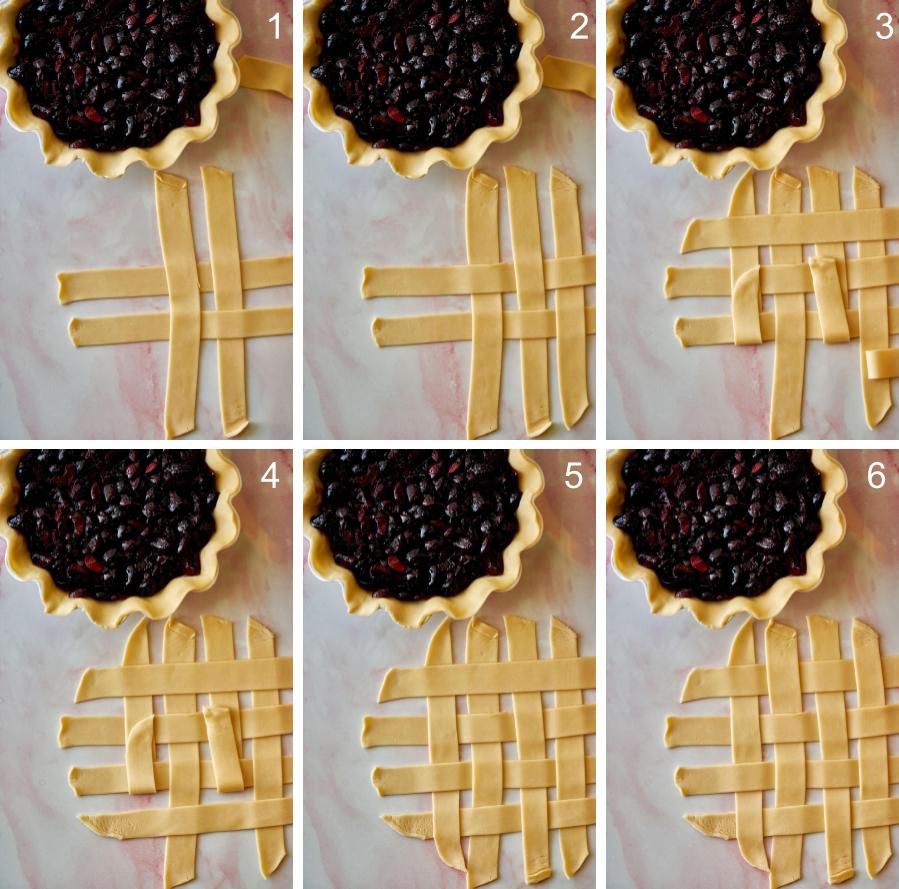
Next, roll out your second circle of pie dough so it is the same thickness (1/8 of an inch thick). Cut the pie dough into thick 1.5 inch strips – you want to have 7 strips total.
Now it’s time to create your lattice crust topping. If it’s easier, create it on your countertop before placing it on top of your pie. Start your lattice from the center, with one vertical strip across the center of your pie.
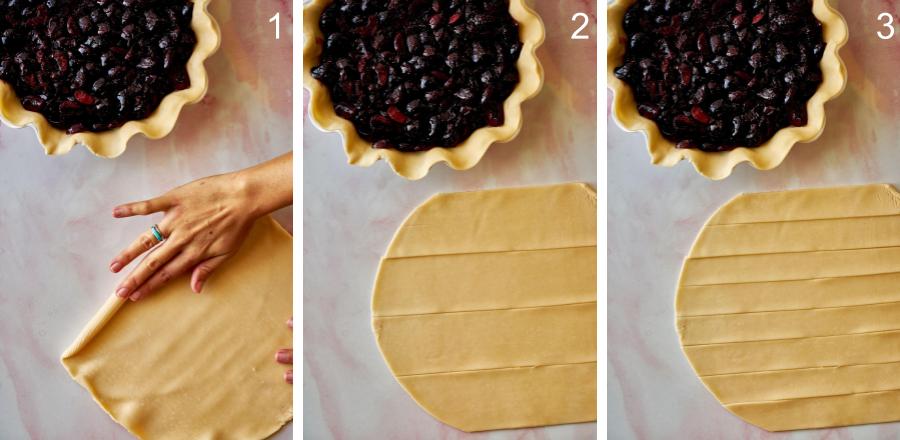
Place one vertical strip on each side so they are evenly spaced. Fold the center vertical strip in half so you can place your first horizontal strip in the opposite direction over the other two vertical strips. Unfold the center strip over the horizontal placed strip.
Repeat and alternate the strips you fold, as shown below, until the pie is covered.
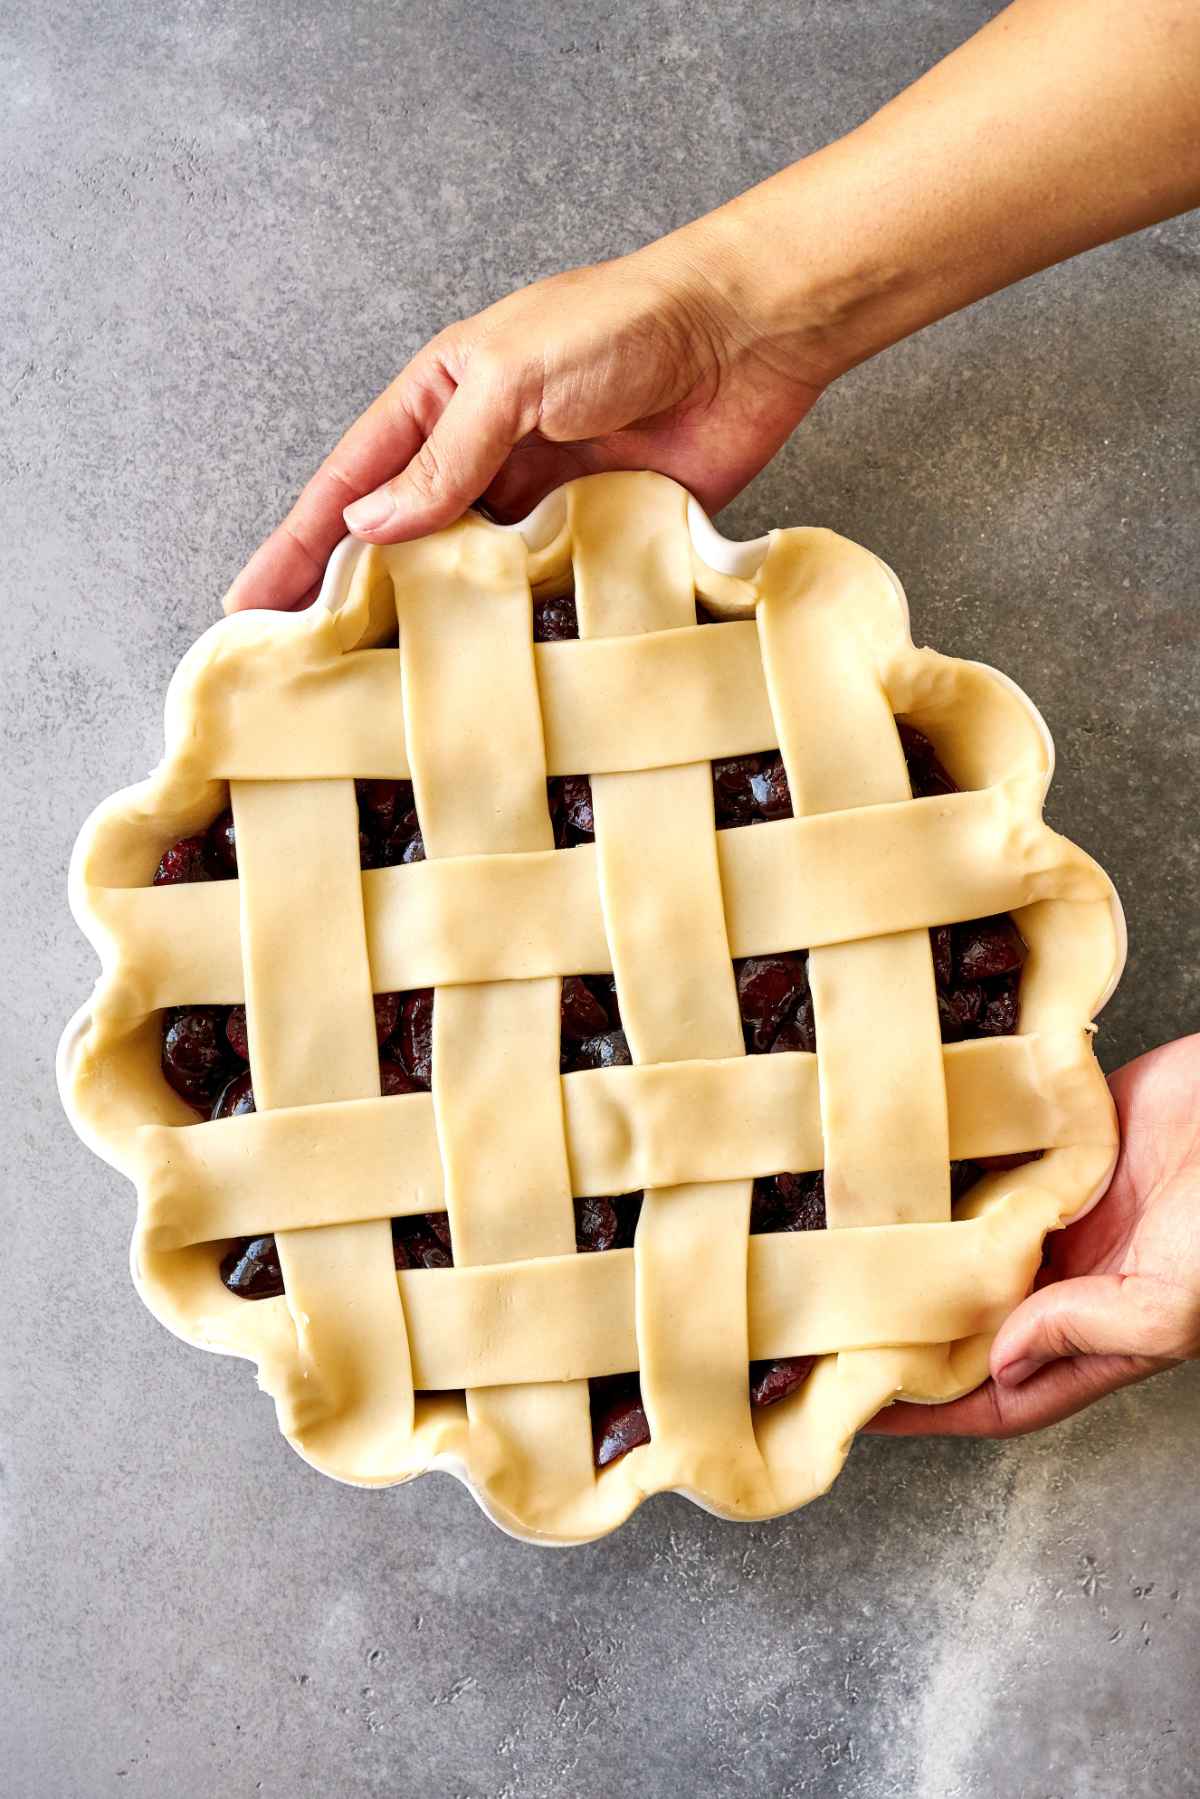
When complete, place your lattice on top of the pie. Pinch the excess top crust edges into the bottom crust. Crimp them as fancy as you’d like, you can use your fingers or a fork.
Now for the final touches. Place a small piece of butter between the lattice, in the gaps. Brush the top of the lattice with egg wash. Sprinkle with 1 tablespoon of turbinado sugar.
Baking your pie
Preheat the oven to 425F. Bake for 20 minutes.
After 20 minutes, drop the oven temperature to 400F, and bake for about 40 minutes until the crust is golden and the filling is bubbling. If the crust browns too quickly, you can cover the pie with a foil tent.
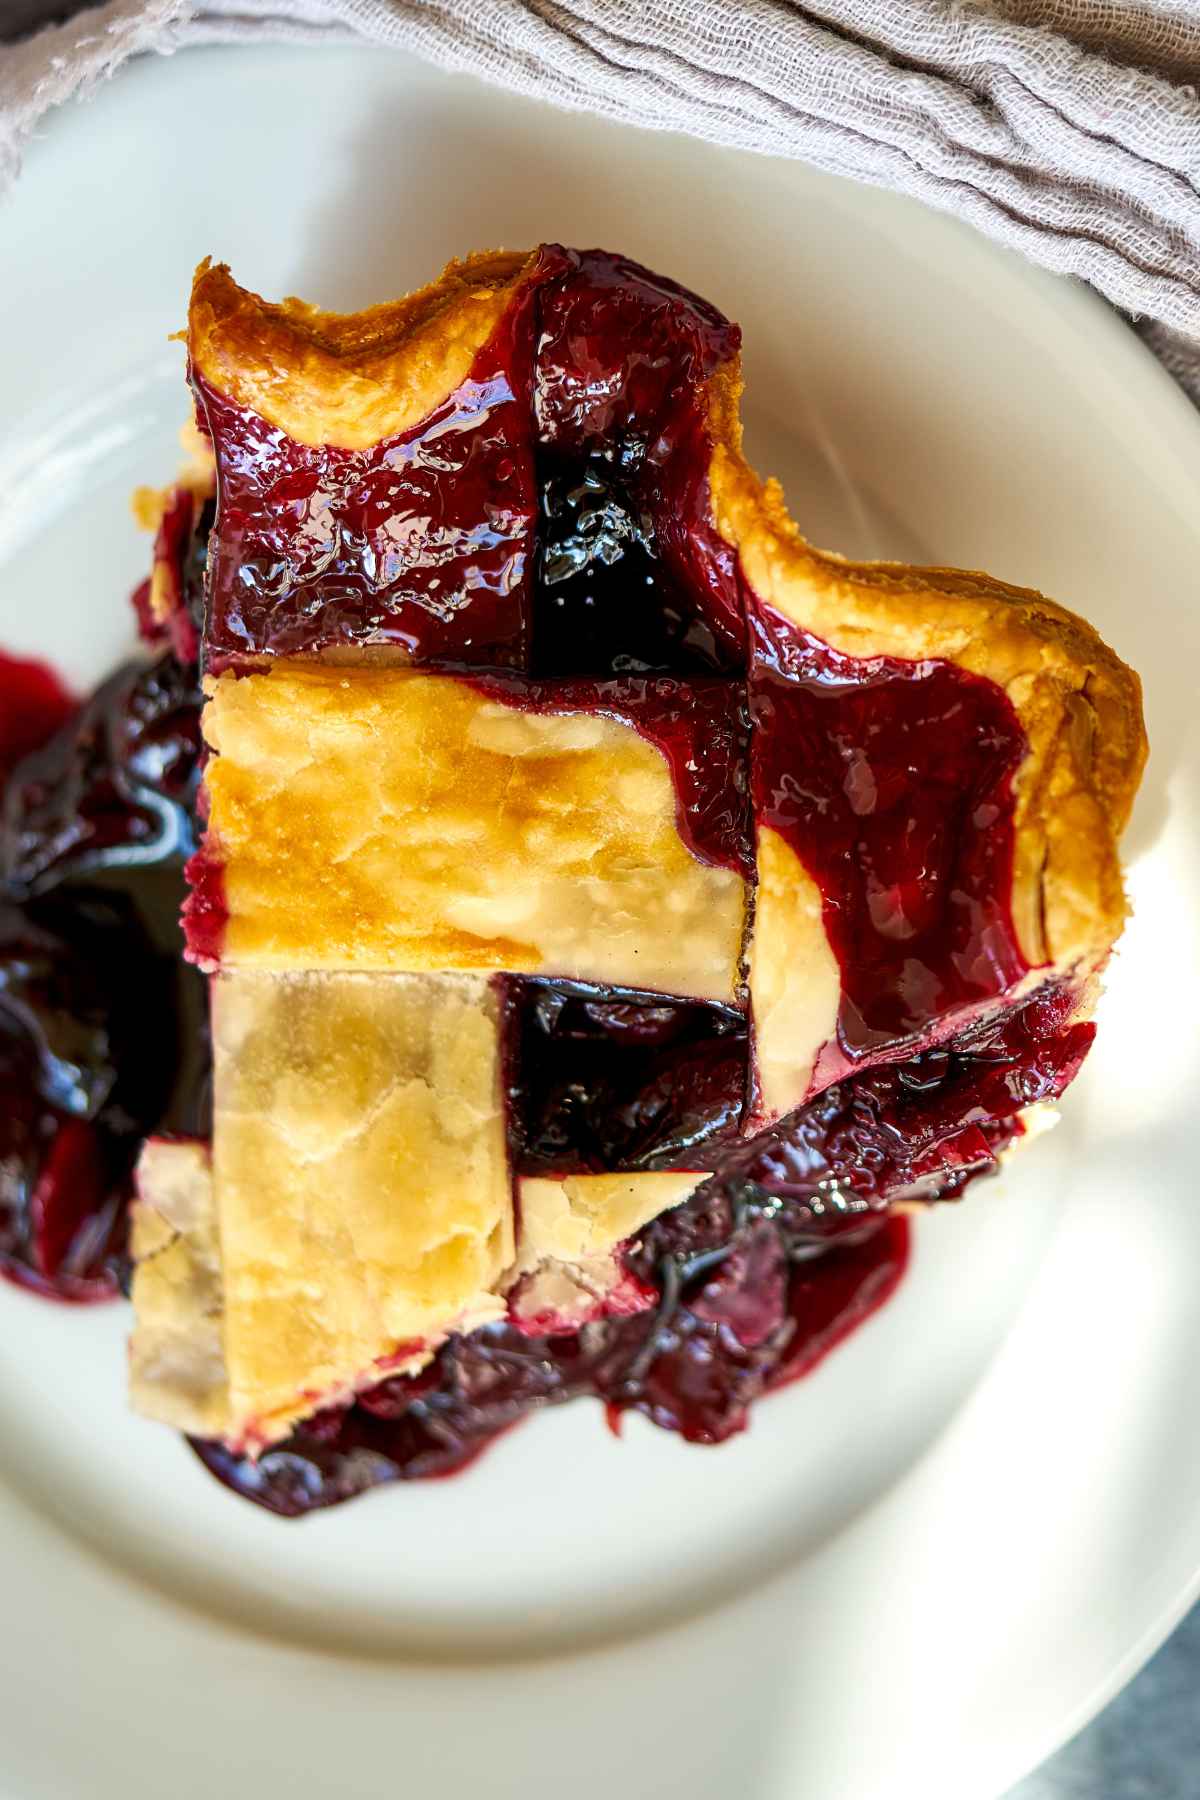
Once your pie is baked, set aside and allow some time to cool, only serving once the pie is at room temperature. You do not want to serve this one piping hot…it will burn and won’t slice well!
Serve as desired with some heavy cream, ice cream or all by its delicious self.
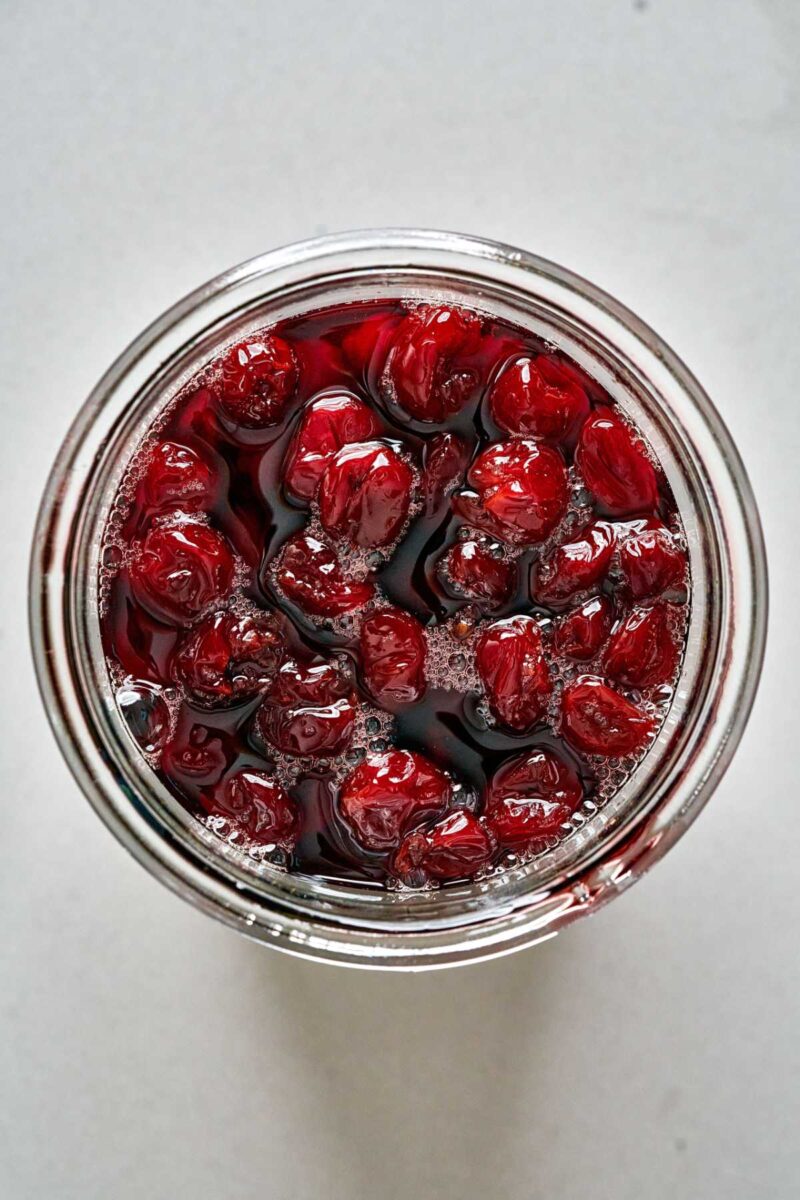
Yes, you can keep the pie filling in a sealed or covered container in the refrigerator for up to 1 week.
Related Recipes
Feel the summer magic with these sweet recipes perfect for cherry season!

★ Did you make this recipe? Please give it a star rating below!★
I love hearing from you! You can also FOLLOW ME on INSTAGRAM, FACEBOOK, TWITTER, and PINTEREST to see more delicious food and what I’m up to.
Cherry Pie Filling and Recipe
Ingredients
- 1 package frozen pie crust 2 crusts (one top, one for the lattice), thawed in the refrigerator overnight
- 6 cups fresh bing cherries pitted, stemmed, and quartered, see note for sour cherries* and note for frozen cherries**
- 1 cup turbinado sugar or granulated sugar
- ¼ cup arrowroot powder or cornstarch
- ½ tsp lemon zest
- 1 tbsp lemon juice
- 3 tbsp unsalted butter cut into small pieces
- 1 egg whisked with 1 tbsp water
- 1 tbsp turbinado sugar to sprinkle on top of the lattice
Equipment
Instructions
- In a large bowl, add the quartered cherries, sugar, arrowroot powder, lemon zest, and lemon juice to a large bowl. Mix the ingredients well, and your filling is ready!
- Roll out your thawed pie crust until it's about ⅛ of an inch thick.
- Press the dough into your chosen pie dish and chill in the refrigerator for 30 minutes.
- Preheat the oven to 350F.
- Bake the crust by covering it with parchment paper and weighing it down with dry beans, pie weights, small shapes of dried pasta noodles, or even clean pennies and other change. Bake for 10-12 minutes.Take it out of the oven and allow it to cool to room temperature.
- Preheat the oven to 425F.
- Roll out your second circle of pie dough so it is the same thickness (⅛ of an inch thick). Cut the pie dough into thick 1.5 inch strips – you want to have 7 strips total.
- Now it's time to create your lattice crust topping. If it's easier, create it on your countertop before placing it on top of your pie. Start your lattice from the center, with one vertical strip across the center of your pie.
- Place one vertical strip on each side so they are evenly spaced. Fold the center vertical strip in half so you can place your first horizontal strip in the opposite direction over the other two vertical strips. Unfold the center strip over the horizontal placed strip.
- Repeat and alternate the strips you fold until the pie is covered.
- Place your lattice on top of the pie. Pinch the excess top crust edges into the bottom crust. Crimp them as fancy as you'd like, you can use your fingers or a fork.
- Place a small piece of butter between the lattice, in the gaps. Brush the top of the lattice with egg wash. Sprinkle with 1 tablespoon of turbinado sugar.
- Bake for 20 miniutes, reduce the temperature to 400F, and bake for another (approximately) 40 minutse suntil golden and the filling is bubbling. If the crust browns too quickly, you can cover the pie with a foil tent.
- Let it cool before serving!
I miss cherry season! By far, my favourite fruit. I usually go through my weight in cherries during the season and I’m glad I had some frozen cherries now to make this pie. It was delicious!
I’m so glad to hear it, Leanne! Frozen cherries are like gold right now!
This made me so nostalgic about summer. I guess I like that you can make all kinds of goodies per season – it makes you appreciate certain things even more. Delicious pie!
Glad to hear it, Danielle! And anything is possible with frozen fruit… we’re so lucky!
The pie crust looks amazing! I typically use tart cherries for pie, but your bing cherry version is too yummy looking to pass up! Came out great.
So happy to hear it! I usually use tart cherries, too… but they’re so much more expensive. So I decided to succeed in making it with sweet cherries… reduced the sugar, etc. Glad you enjoyed! Here’s my favorite galette with sour cherries!