
This 72-Hour Pizza Dough creates an unbelievably tasty dough perfect for any combination of toppings. You may ask, why make pizza dough that takes 3 days? Because with just 10 minutes of prep, and a few days of patience, I promise it will be the most flavorful pizza dough imaginable.
Why You’ll Love This Recipe
Making homemade pizza dough may seem intimidating, but with some simple prep beforehand and a few day’s patience, you have an incredible and flavorful pizza dough that you can use in a bunch of different ways!
The magic of this dough is how simple it is – it has very few ingredients and it works every single time.
The dough does take a little while to be ready, but the steps are really simple and don’t require much time to do, you just have to be patient while the dough flavor develops.
Making pizza dough is so rewarding, and this recipe is perfect if you want to be in charge of exactly what ingredients are in your dough. It produces a thin, crispy dough that is a reliable base for any sauce and toppings.
Ingredients & Substitution
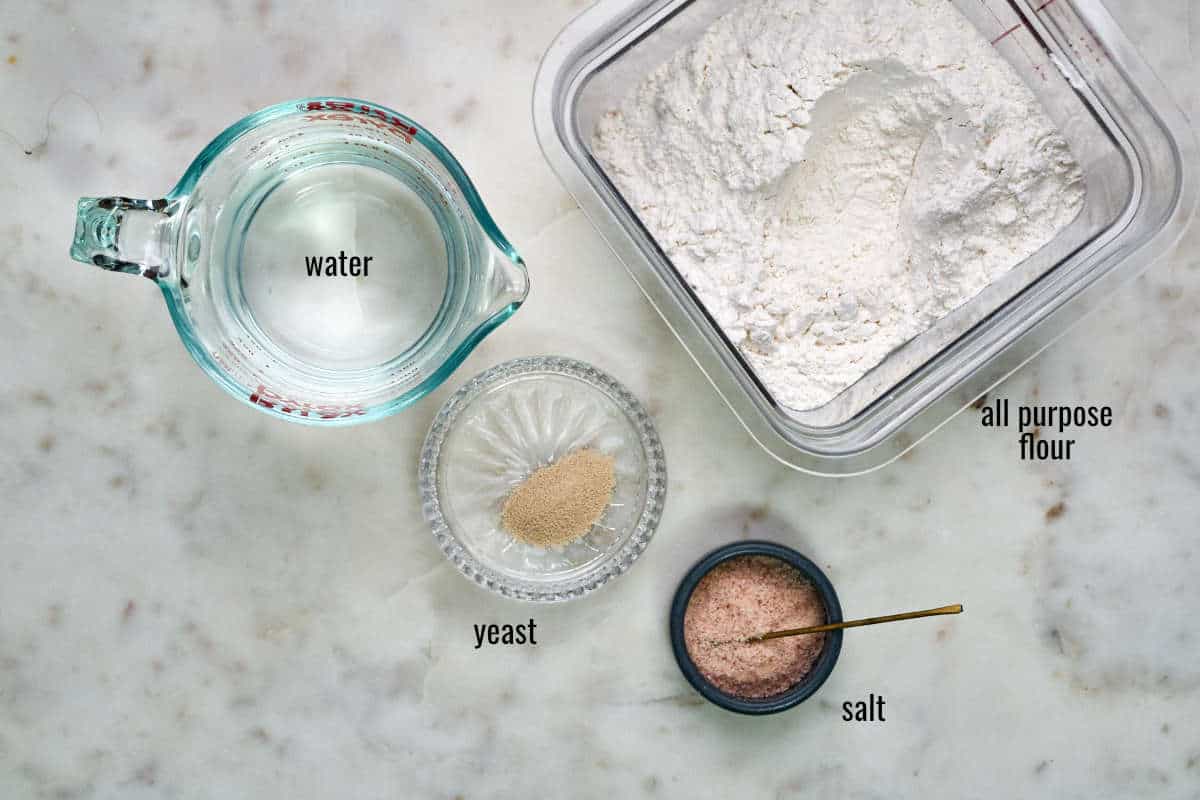
Flour – I use unbleached all-purpose flour in this recipe, but it also works with bread flour.
Yeast – This is the rising agent in the dough.
Salt – I’m using pink salt but you can use any ground salt
Water – lukewarm water is generally 98-105F. The water should not be hot or it will kill the yeast.
How to Make 72-Hour Pizza Dough
Day 1
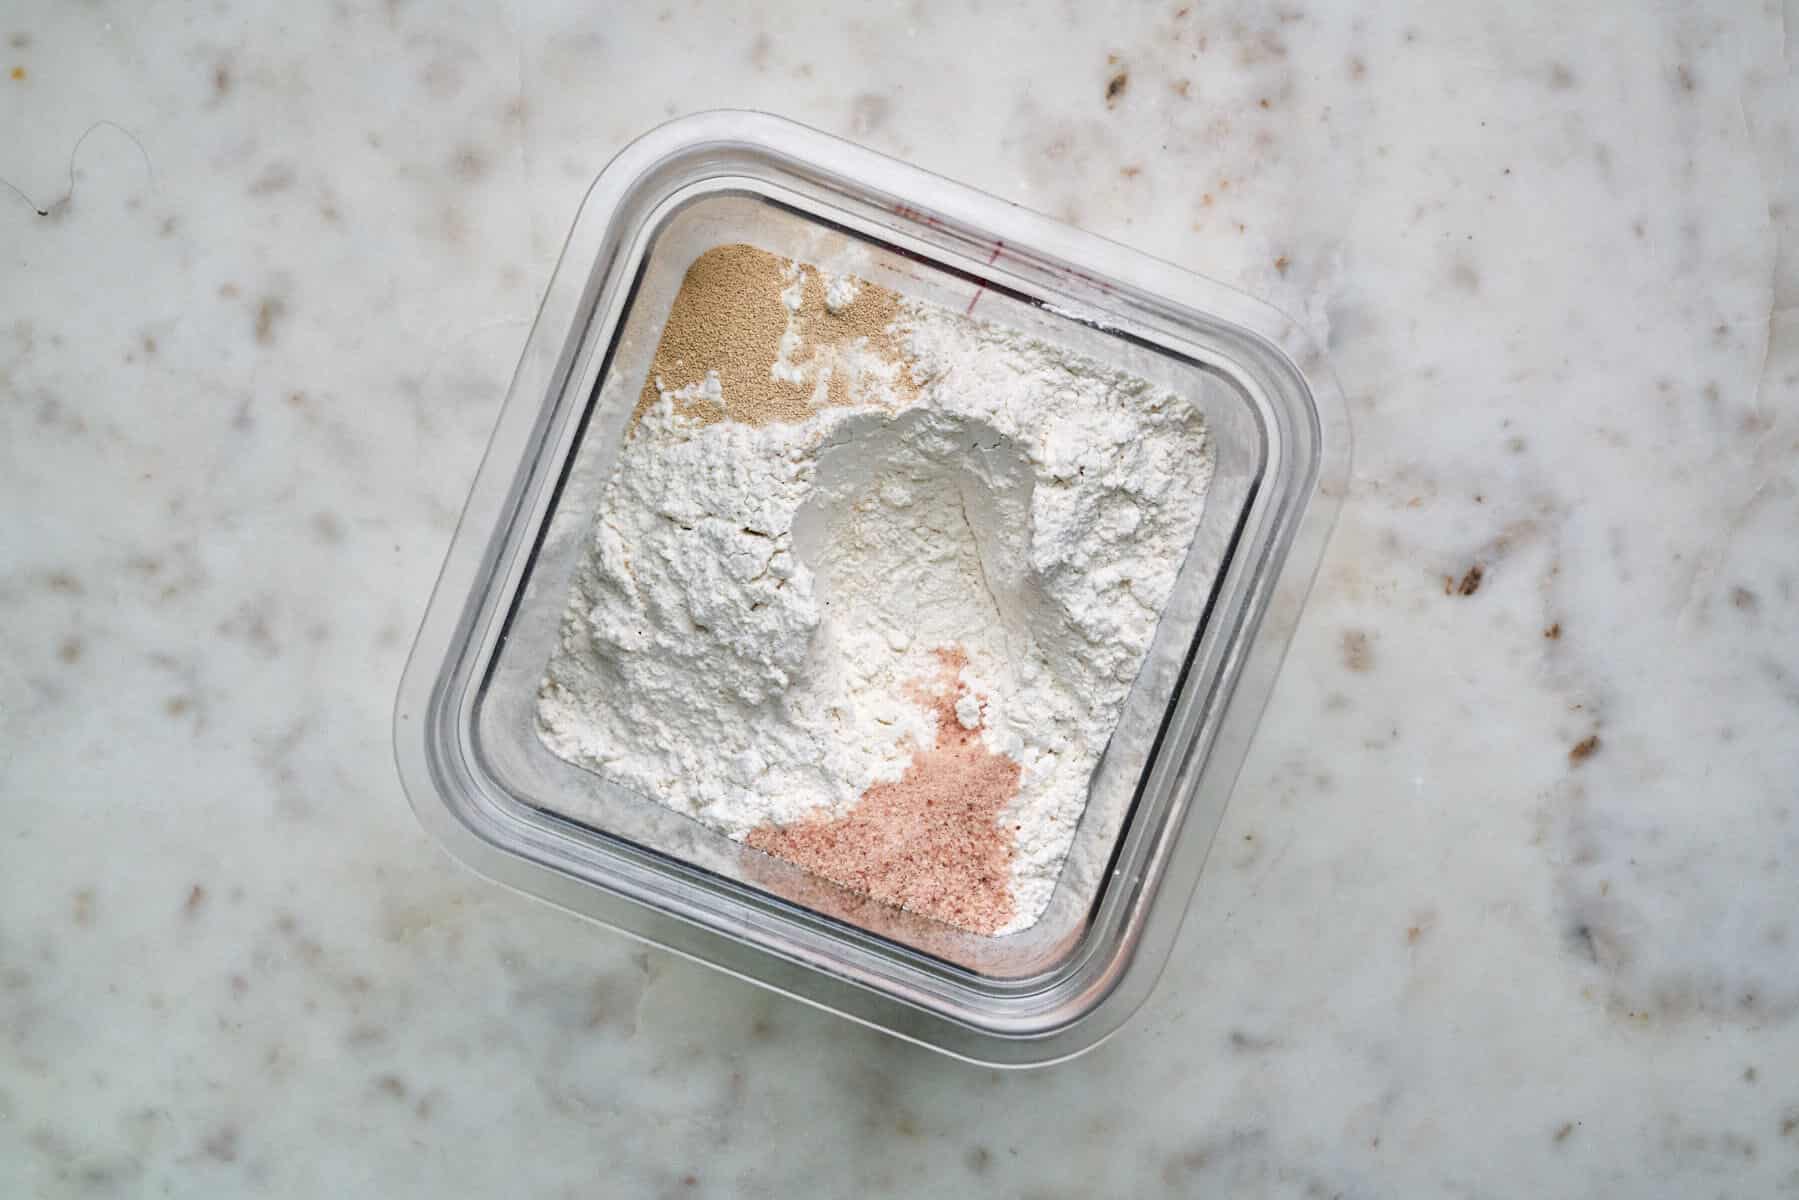
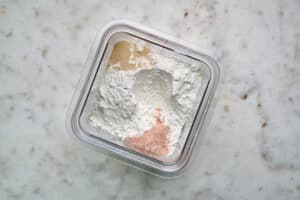
Add the flour, yeast, and salt to a large bowl or food-grade plastic container with a lid [click to shop, link opens in new tab].
Note: The salt will deactivate the yeast, so place them on separate sides of the container.
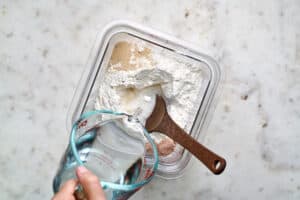
Slowly add water, using a wooden spoon mix thoroughly.

Knead in the bowl for 2 minutes until the dough is fully incorporated.
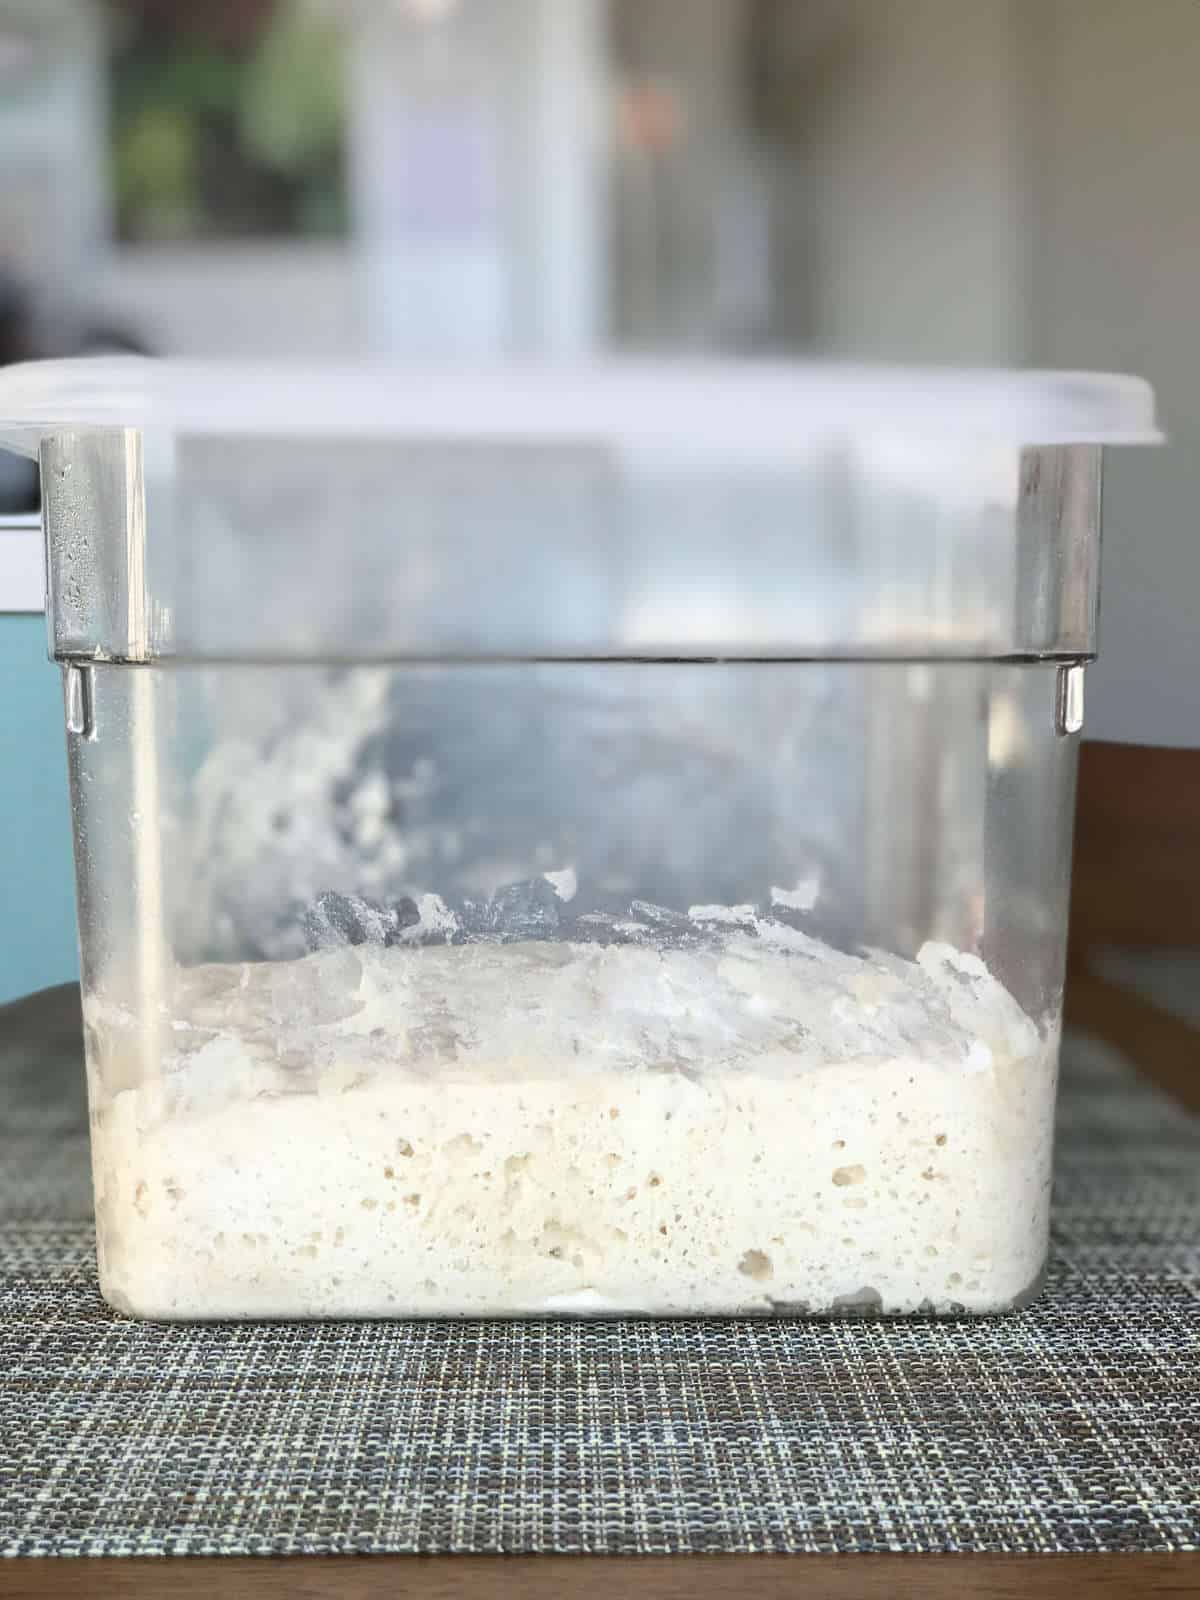
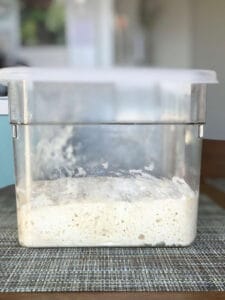
Cover with a damp cloth, the lid, or plastic wrap. Let it sit at room temperature for 24 hours.
Day 2
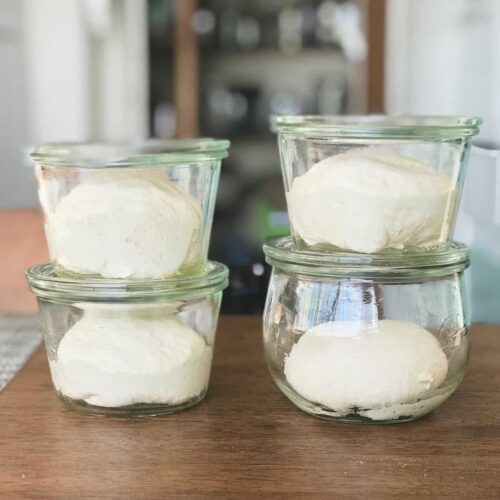
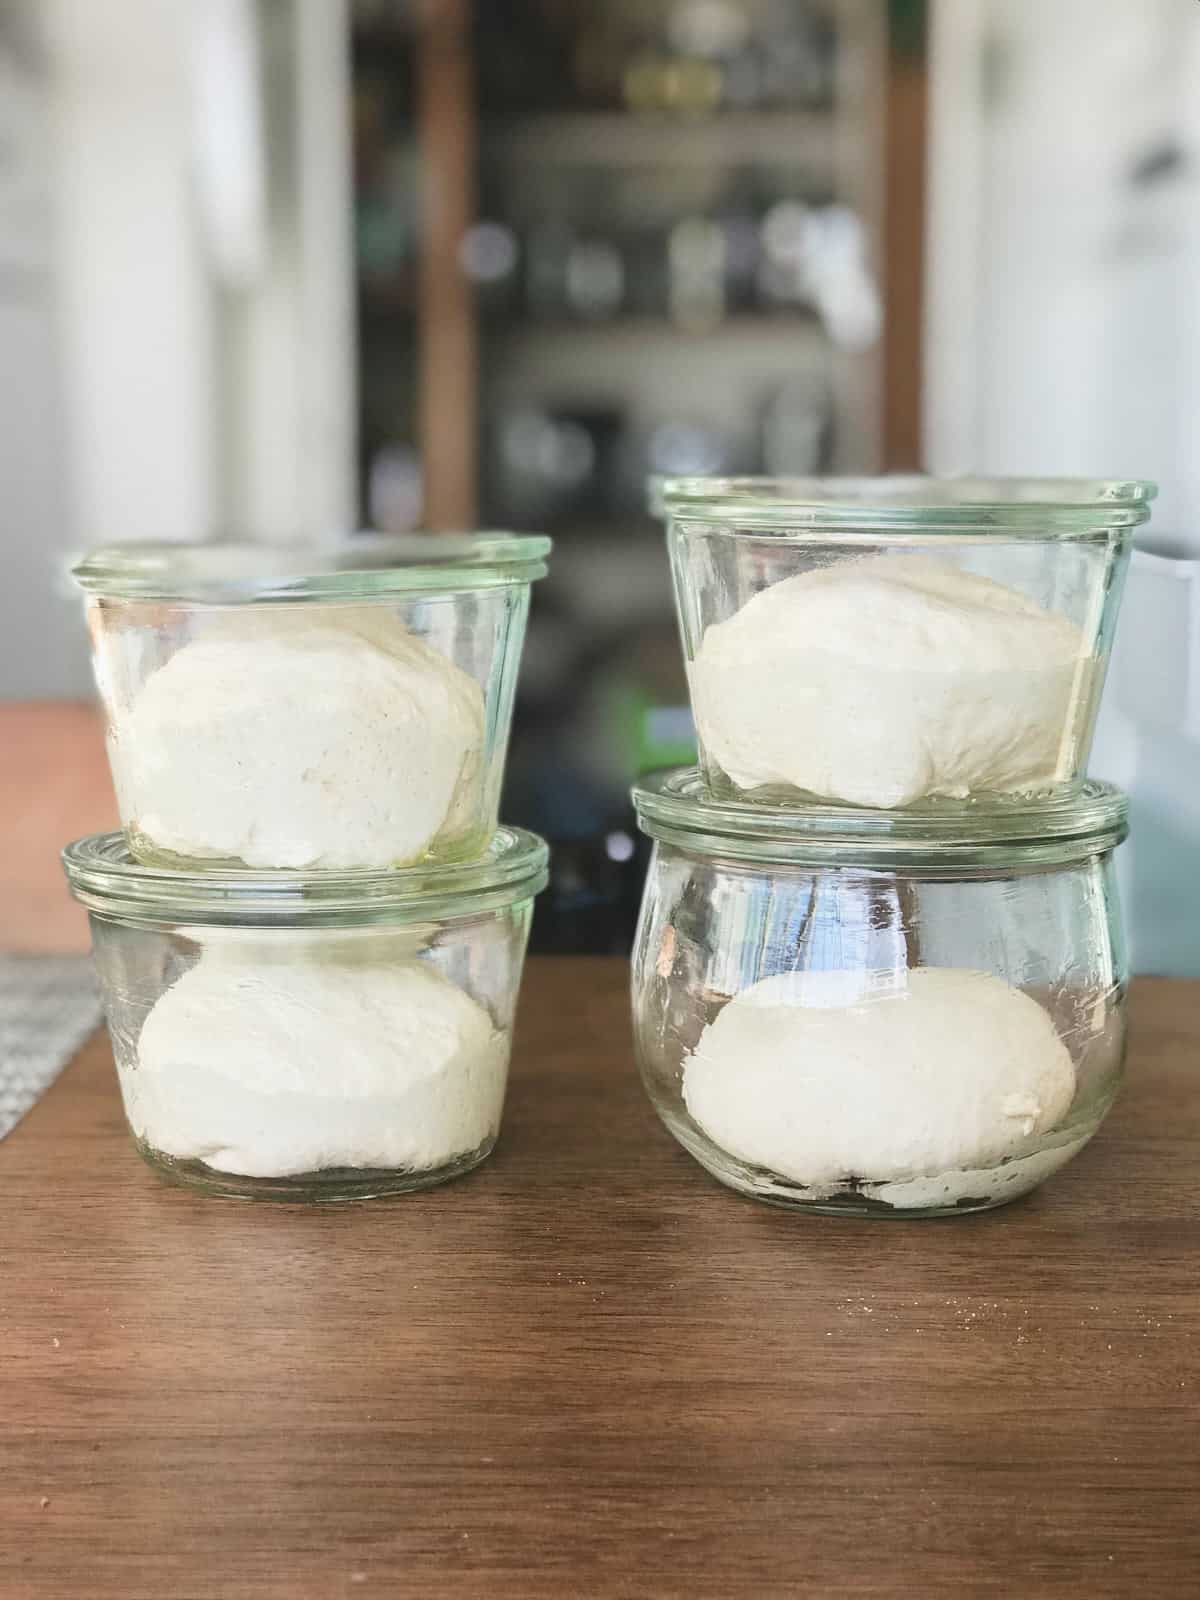
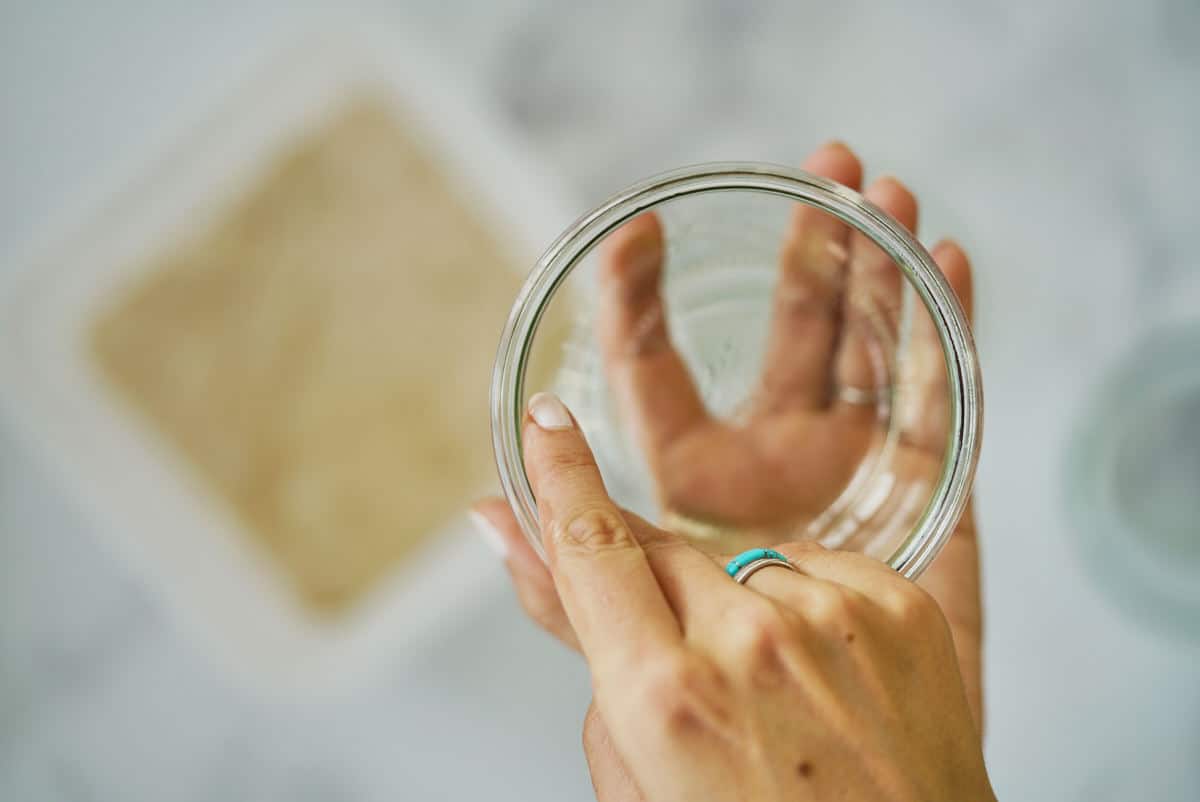
Lightly oil 4, 1/2-L jars or bowls [click to shop jars, link opens in new tab].
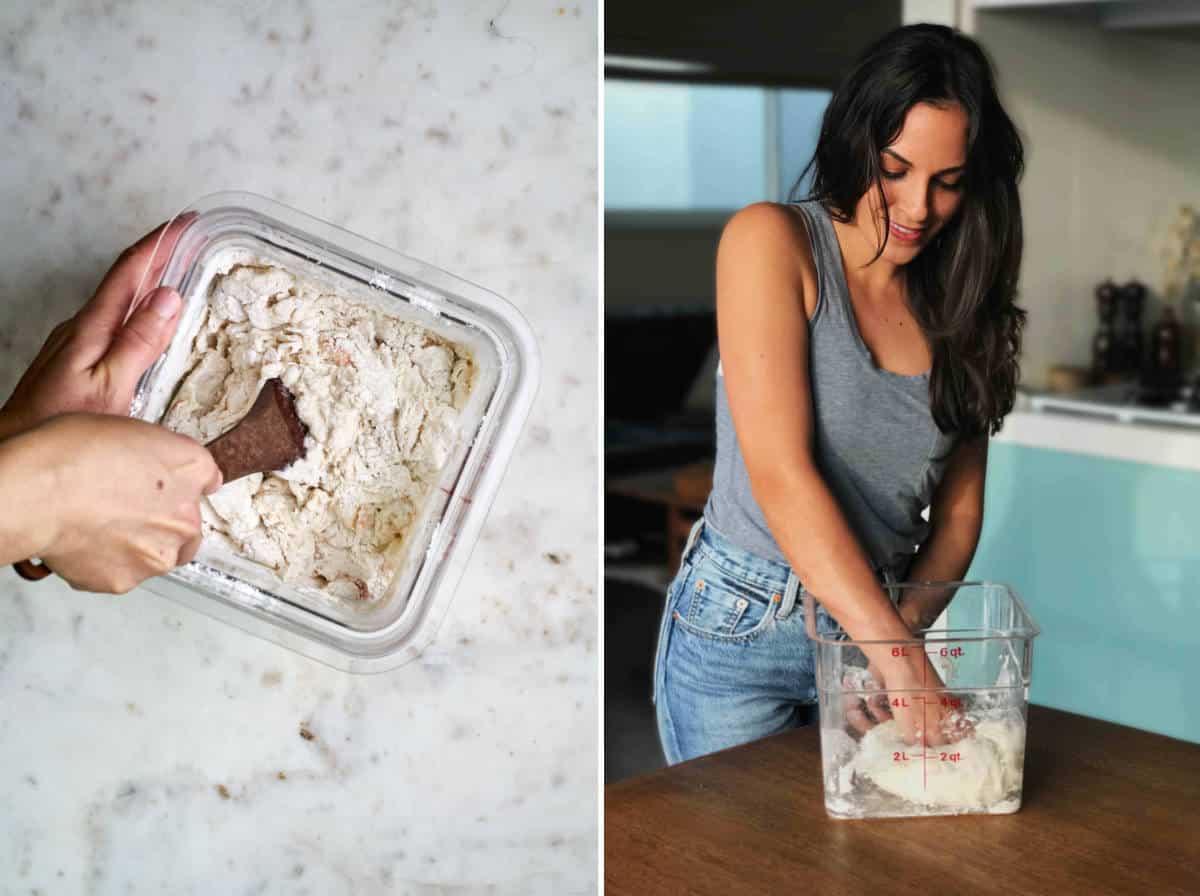
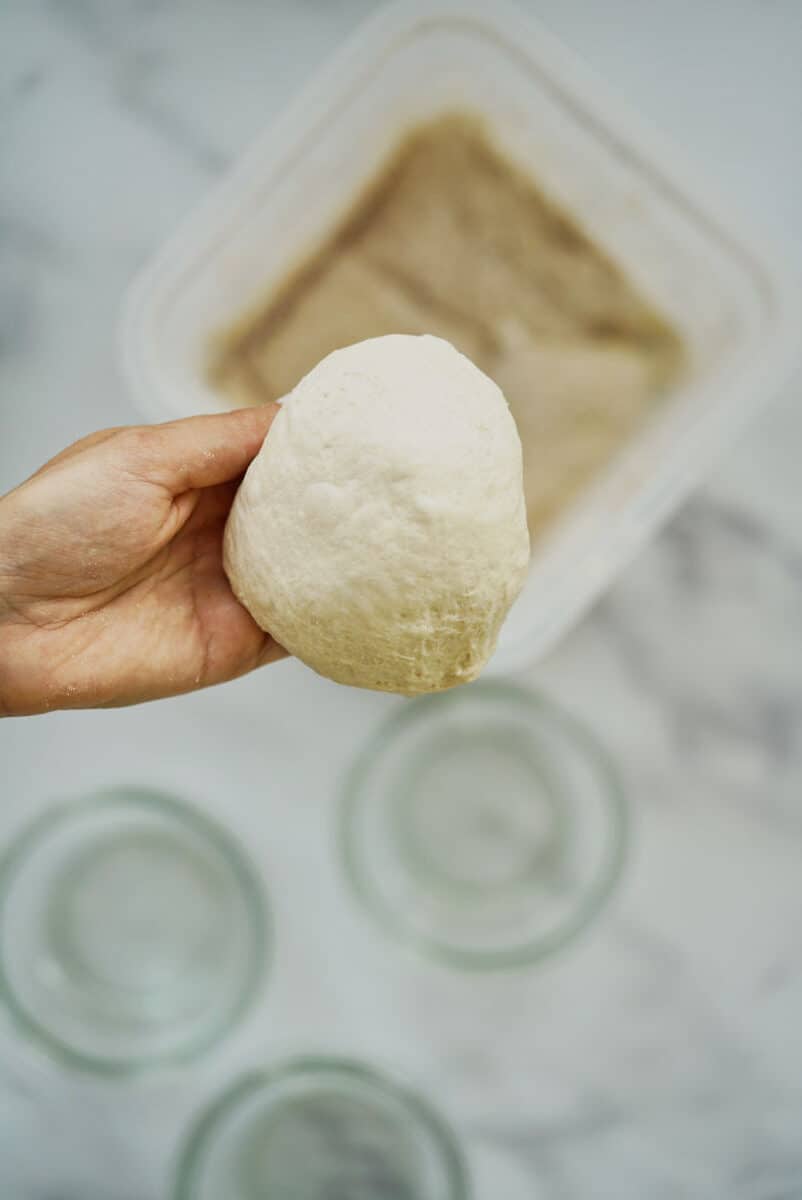
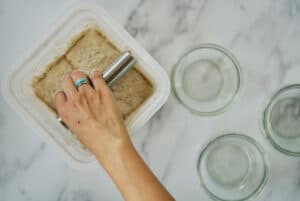
Flour the surface of the dough. Then, divide the dough into 4 equal portions.

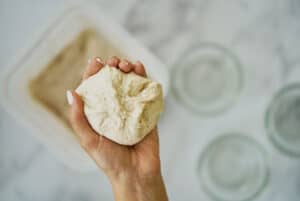
Place one portion between your hands and fold two sides into the center. Rotate 90 degrees fold into the center and continue this process until a ball is formed.
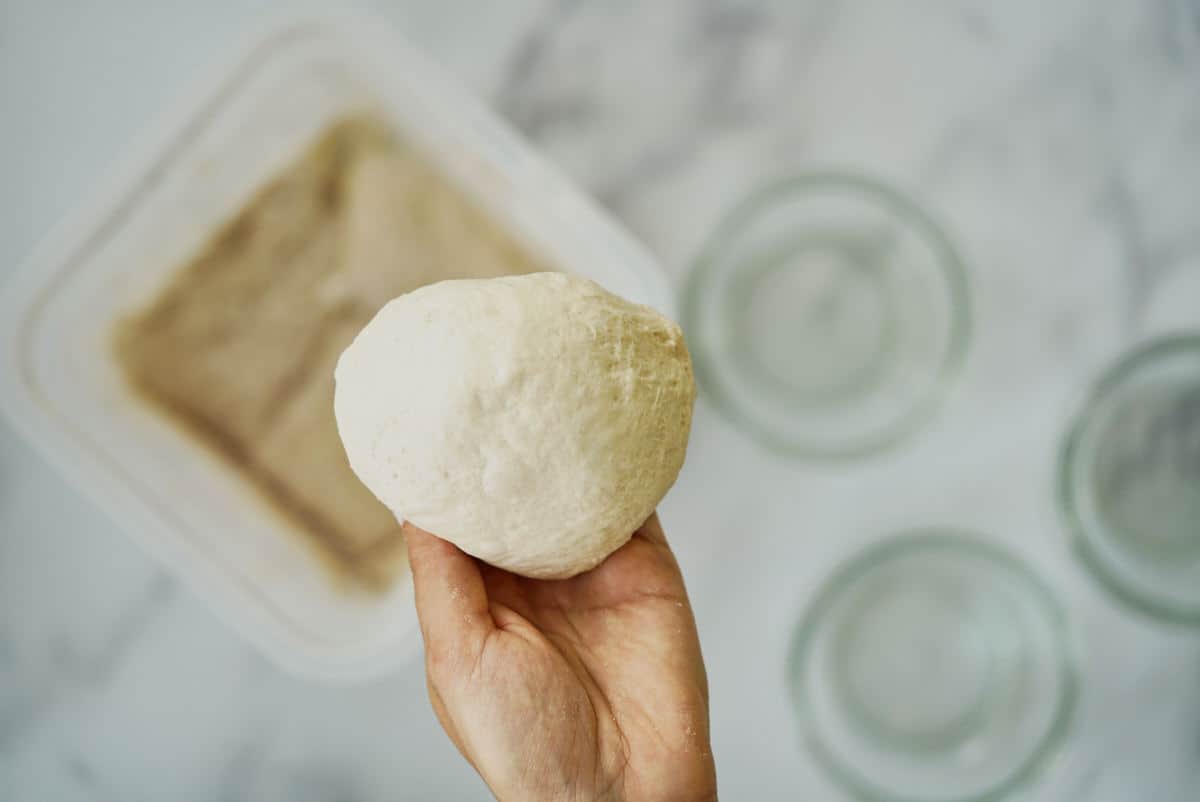
Place the smooth side into the palm and swiftly pinch the seam closed.
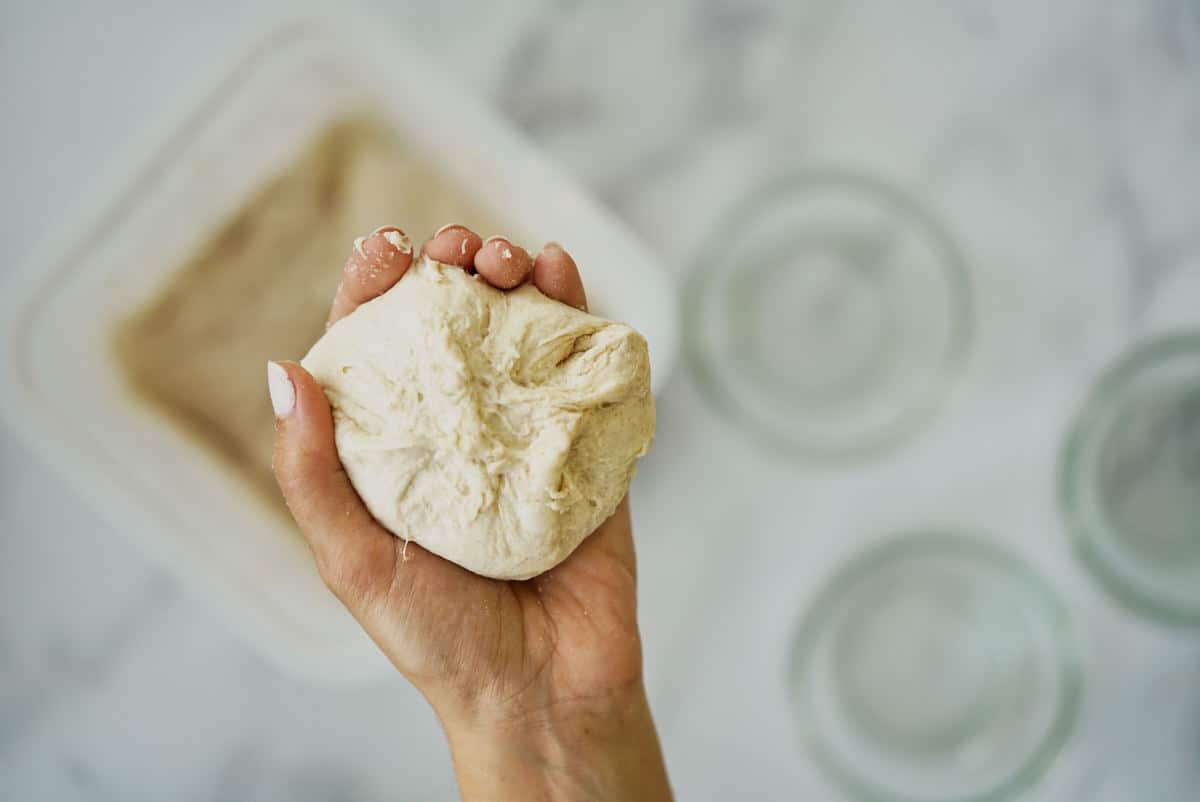
Place each dough ball into the oiled jars or bowls, and place in the fridge for 48 hours. Remove the dough from the refrigerator 1 hour before use.
Pizza Dough, Equipment, & Tips
Here are some tips & methods I use on our weekly pizza night:
- This recipe makes 4 individual pizzas. I prefer making individual-sized pizzas, even if we are sharing them because they are easier to transfer in and out of the oven when we use our pizza peel.
- You can use this recipe after 25 hours instead of waiting for the 72-hours. However, the dough flavor will be much blander. Simply split the dough into the 4 dishes after 24 hours and let it rise at room temperature for 1 hour before using.
- If making focaccia pizza, similar to Roman-style pizza, you can use this Bon Appetit recipe for No-Knead Focaccia (link opens in new tab). Bake the focaccia for 20 minutes, then add the sauce and toppings, bake an additional 8-10 minutes, and finally, broil on high for 2 minutes to get the cheese bubbly.
- Use baking steel to prevent a soggy pizza bottom. Preheat your oven with the baking steel inside. Here is a link to purchase one (the affiliate link opens in a new tab).
- You can bake the pizza on the baking steel directly, or place a baking sheet on the steel. If you are new to making pizza and not very adventurous, I recommend using a baking sheet your first few times.
- If you are baking directly on the baking steel, use a pizza peel to transfer the pizza in and out of the oven. Here is a link to purchase the pizza peel (and cutter) that I love (the affiliate link opens in a new tab). It has a thin lip, making it much easier to use than the ones that have a thick lip.
- When splitting this dough into four parts on day 2, I like to use these glass jars (affiliate link opens in new tab). This size fits the dough (after it rises) perfectly with a wide enough opening to get the dough out easily.
- Weigh the flour for perfect results. I use a kitchen scale in most of my baking because flour can be measured differently based on how packed it is. [Click to shop kitchen scale, affiliate link opens in new tab.]
Toppings for Your Pizza Dough
Try these versatile and delicious pizza topping combinations.


I love hearing from you! You can also FOLLOW ME on INSTAGRAM, TIKTOK, and PINTEREST to see more delicious food and what I’m up to.
72-Hour Pizza Dough
Ingredients
- 500 grams all purpose flour 3 3/4 cups
- 16 grams sea salt 2 tsp
- 1 gram active dry yeast 1/4 tsp
- 350 grams water 1 1/2 cups , lukewarm
Instructions
- Add the flour, yeast and salt to a large bowl or food-grade plastic container with lid.

- Slowly add water, using a wooden spoon mix thoroughly.
- Knead in the bowl for 2 minutes until the dough is fully incorporated.

- Cover with a damp cloth, the lid, or plastic wrap. Let it sit at room temperature for 24 hours.


- Lightly oil 4, 1/2-L jars or bowls

- Flour the surface of the dough. Then, divide the dough into 4 equal portions.
- Place one portion between your hands and fold two sides into center. Rotate 90 degrees and fold into center and continue this process until a ball is formed.
- Place smooth side into palm and swiftly pinch the seam closed.
- Place each dough ball into the oiled jars or bowls, and place in the fridge for 48 hours.


- Remove the dough from the refrigerator 1 hour before use.
Cant wait to try this..! Is there a difference if you split the dough after 72 hour compared to splitting it after the 24 hr room temp ?
Hi Anh, great question! Allowing the dough to rise twice gives you a finer grain structure, which is what we are looking for in pizza dough.
When you are ready to bake do you knead before spreading. In the pan
No need to knead before spreading… just spread 🙂
We have used this a few times. Great home made pizza dough!
Glad to hear it, Rebecca… thank you for sharing!
Hi! When you place the dough in the fridge for 48 hours does the container need to be covered? Thanks 🙂
Yes, covered 🙂
Hi, with this recipe do you not have to activate the yeast in Luke warm water prior to mixing?
Not in this recipe. You mix it together with the lukewarm water and flour all together. Hope this helps!
Excellent, thank you Candice, I’ve made a batch and currently on my first 24hr bulk ferment, fingers crossed will be perfect for when I use it this week. Many thanks for your reply.
My pleasure! And can’t wait to hear what you think 🙂